

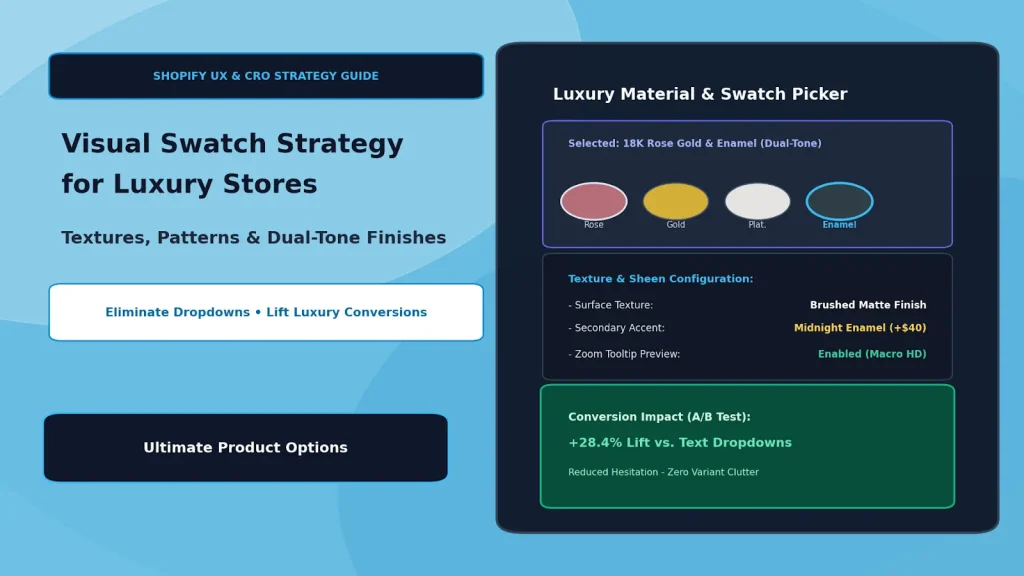
Visual Swatch Strategy: Upgrading from Dropdowns to Texture, Pattern, and Dual-Tone Swatches
In luxury fashion, fine jewelry, custom upholstery, and bespoke home furnishings, purchase decisions are rarely driven by text specifications alone. High-end buyers do not merely buy "Brown Leather" or "Gold Metal"—they buy the rich, tactile grain of Tuscan full-grain cowhide, the warm luster of 18K brushed rose gold, or the deep weave of Belgian linen.
Yet, countless Shopify stores continue to present high-ticket materials through native HTML select dropdowns.
Forcing a shopper to read through abstract text labels like "Midnight Espresso / Patina Sheen" or click back and forth between isolated dropdown options introduces cognitive friction. When customers cannot instantly visualize tactile differences, hesitation sets in, product page dwell time stagnates, and cart abandonment spikes.
To drive conversion rate optimization (CRO) on premium catalogs, luxury merchants are replacing text dropdowns with interactive visual swatches, photorealistic texture overlays, and dual-tone variant selectors.
Table of Contents
- Why Dropdowns Hurt Luxury E-Commerce Conversion Rates
- The Swatch Hierarchy: From Flat Color Dots to Rich Textures
- CRO Comparison: Visual Swatches vs. Native Dropdowns
- Step-by-Step Setup: Implementing Rich Swatches with Ultimate Product Options
- Best Practices for Swatch Optimization
- Frequently Asked Questions (FAQs)
Why Dropdowns Hurt Luxury E-Commerce Conversion Rates
Native select dropdowns were designed for generic utility, not sensory-rich shopping experiences. In premium retail, they introduce major UX barriers:
- Hidden Variant Discovery: Dropdowns conceal available finishes behind an extra click. Buyers must click open the menu to see what other colors or textures exist.
- Loss of Sensory Context: Text descriptions like "Satin Walnut" or "Oatmeal Bouclé" fail to communicate depth, tactile grain, or ambient light reflection.
- High Interaction Cost on Mobile: Opening native mobile dropdown wheels disrupts browsing flow and hides critical product photography beneath the device keyboard.
- Lack of Multi-Material Expression: Native dropdowns cannot display two-tone pairings (such as an exterior watch bezel color paired with an internal dial enamel) without creating endless permutations.
The Swatch Hierarchy: From Flat Color Dots to Rich Textures
Level 1: Basic Hex Color Dots
(Flat RGB circles — insufficient for luxury leather, fabrics, or metals)
[ #000000 ]    [ #8B4513 ]    [ #D4AF37 ]

                          ▼
Level 2: Photorealistic Macro Textures
(High-res crop showing natural grain, weave density, and light reflection)
[ Leather Grain ]    [ Bouclé Weave ]    [ Brushed Titanium ]

                          ▼
Level 3: Multi-Tone & Dual-Zone Swatches
(Diagonal split or inner/outer ring showing two distinct materials)
[ Gold / Enamel ]    [ Wood / Brass Inlay ]    [ Two-Tone Leather ]
Upgrading to Level 2 and Level 3 visual swatches transforms passive variant selection into an engaging, sensory evaluation that builds buyer confidence.
CRO Comparison: Visual Swatches vs. Native Dropdowns
| Dimension | Native Select Dropdowns | Advanced Visual Swatches |
|---|---|---|
| Catalog Visibility | Hidden until clicked | All materials visible at a glance |
| Tactile Communication | None (pure text labels) | High-definition micro-texture crops |
| Complex Finishes | Impossible (cannot convey metallic sheen) | Dual-tone splits & luster overlays |
| Mobile UX | Native OS picker popups | Direct single-tap touch targets |
| Average Conversion Lift | Baseline standard | +18% to +28% in luxury A/B testing |
Step-by-Step Setup: Implementing Rich Swatches with Ultimate Product Options
Creating tactile, photorealistic swatches on Shopify requires no custom theme code when using Ultimate Product Options.
Step 1: Install Ultimate Product Options
Install Ultimate Product Options from the Shopify App Store and enable the app embed in your Online Store 2.0 theme customizer.
Step 2: Create a Luxury Option Template
- In your Shopify admin, open Apps > Ultimate Product Options.
- Click Create Option Set and title it (e.g., Fine Jewelry - Metal & Finish Suite).
- Assign the template to your jewelry, furniture, or apparel collections.
Step 3: Add Visual Image & Texture Swatches
- Add a new option field and choose Color / Image Swatch.
- Set the display style: choose between circular, rounded square, or oversized pill swatches.
- Rather than entering flat hex color codes, upload high-resolution macro crops (e.g., 200×200px PNG) of your physical materials:
- Full-Grain Leather: Upload a macro crop showing surface grain and pull-up effect.
- Wood Finishes: Upload authentic grain patterns (Walnut, Smoked Oak, White Ash).
- Textiles: Upload magnified weave patterns (Velvet, Linen, Bouclé).
Step 4: Configure Dual-Tone & Metallic Sheen Finishes
For luxury goods that combine two materials (such as a ring band with an accent inlay, or two-tone leather piping):
- In the swatch editor, select Dual-Tone / Split Swatch.
- Assign the primary color/texture (e.g., 18K Yellow Gold) and secondary accent (e.g., Emerald Green Enamel).
- The app generates a clean diagonal split or concentric ring swatch on the live storefront.
- Attach dynamic price modifiers (e.g.,
+$40.00 for Enamel Inlay) so the product total recalculates in real time when selected.
Step 5: Add Zoom Tooltips & Material Storytelling
- Enable Hover Tooltips so shoppers see the formal finish name and description (e.g., "Cognac Vachetta — Vegetable-Tanned Italian Leather") upon mouseover or mobile focus.
- Enable optional swatch zoom popovers to allow buyers to inspect fine weave density or metallic flake without leaving their spot on the page.
Step 6: Test on the Storefront
Save and publish your option set. Verify on both desktop and mobile:
- Tapping a swatch updates the active border highlight instantly.
- Price add-ons update the total dynamically without layout shift.
- Selected swatch names and finish codes pass directly into Shopify line-item properties for accurate warehouse fulfillment.
Best Practices for Swatch Optimization
- Standardize Crop Angles: Shoot all fabric or metal texture swatches under identical lighting and scale so finishes look uniform side by side.
- Keep Mobile Hit Areas Generous: Set swatch dimensions to at least 44×44px with 8px margin to ensure frictionless tapping on touchscreens.
- Pair with Dynamic Image Switching: Ensure selecting a swatch swaps your main product gallery image to the corresponding colorway, reinforcing buyer confidence.
- Limit Total Choices to Prevent Paralysis: Group large collections into curated palettes (e.g., "Classic Neutrals" vs. "Seasonal Bolds") using conditional tabs or toggles.
Frequently Asked Questions (FAQs)
Do image texture swatches slow down Shopify page loading speed?
No. Ultimate Product Options serves swatches via high-speed global CDNs with automatic WebP compression, lazy loading, and sub-second asset delivery to keep storefront performance fast.
Can swatches trigger different product gallery photos?
Yes. The app allows you to link specific swatches directly to Shopify media gallery images so that selecting an upholstery fabric or metal finish immediately updates the main hero photo.
Can I add upcharges to specific premium swatches?
Yes. You can assign fixed dollar add-ons or percentage upcharges to individual swatches (such as +$25 for Italian leather or +$50 for platinum), dynamically updating the checkout price.
Conclusion
In high-end e-commerce, the buying experience must reflect the quality of the craftsmanship. Replacing sterile dropdown menus with rich, tactile texture swatches and dual-tone selectors removes visual ambiguity, honors your materials, and significantly lifts conversion rates.
With Ultimate Product Options, luxury merchants can configure photorealistic texture swatches, split-color finishes, and dynamic price modifiers in minutes—with zero coding required.