

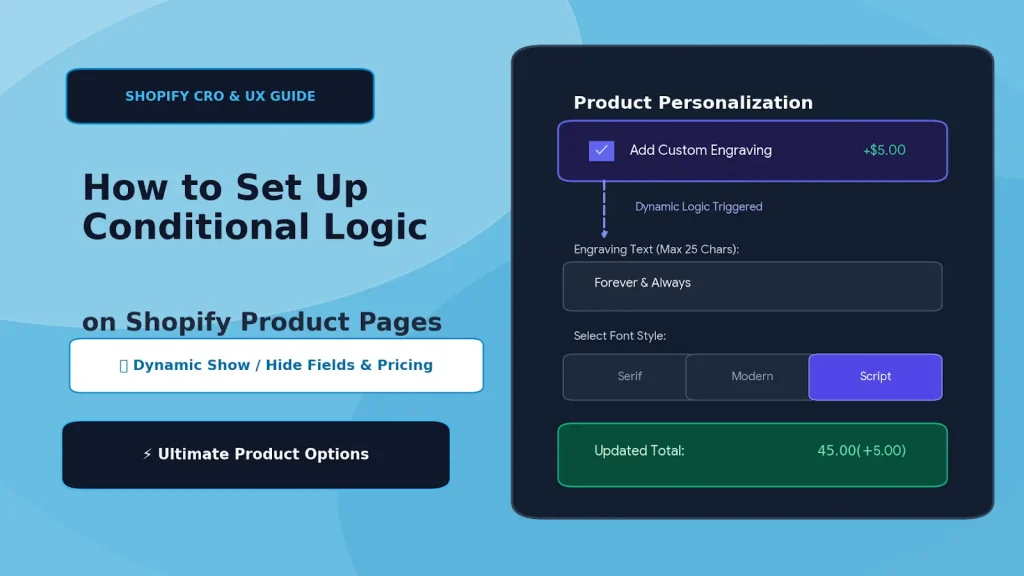
When selling custom, personalized, or configurable products, one of the fastest ways to kill your conversion rate is form fatigue.
If a customer lands on your product page and sees dozens of visible fields—text inputs, font selectors, file upload buttons, gift wrapping options, and color swatches—they get overwhelmed. Worse, forcing shoppers to look at irrelevant fields (such as engraving options when they only want the base item) adds visual clutter and creates unnecessary friction.
The solution is conditional logic (also known as dynamic product options or show/hide rules).
In this step-by-step guide, you’ll learn what conditional logic is, why it is essential for high-converting stores, and how to configure clean, dynamic forms on your Shopify product pages without writing custom code.
What Is Conditional Logic on Shopify Product Pages?
Conditional logic allows you to show, hide, or alter product options dynamically based on the customer's prior selections.
Instead of showing all options upfront, your product page acts as a responsive decision tree:
[ Customer visits product page ]
               │
               ▼
   [ "Add Custom Engraving?" ]
        ├── (No)  ──> Keeps page clean & simple
        │
        └── (Yes) ──> [ Reveal Engraving Text Input ]
                  ──> [ Reveal Font Style Selector ]
                  ──> [ Apply +$5.00 Add-On Upcharge ]
Common Use Cases:
- Custom Jewelry & Watches: Revealing text inputs, font pickers, and placement options only if "Add Engraving" is checked.
- Gift Orders: Showing custom gift message boxes and wrap styles only when "Include Gift Packaging" is toggled.
- Custom Apparel & Merchandise: Revealing a file upload box only when the customer selects "Custom Logo Print".
- Tiered Bundles: Displaying flavor/variant selectors based on the package size chosen (e.g., show 3 flavor pickers for a 3-pack, and 6 for a 6-pack).
Why Native Shopify Variants Fall Short
Native Shopify product setups handle basic variants like Size or Color, but they cannot handle dynamic branching or custom inputs:
- No Native "If/Then" Logic: Shopify’s native admin cannot conditionally show or hide option fields based on variant selections.
- Variant Cap Limitations: Native Shopify limits products to 3 option dimensions. Complex configurations with multiple customizable layers quickly exceed this limit.
- No Dynamic Price Modifiers for Custom Inputs: You cannot natively tie an upcharge (like a +$8 engraving fee) to a text field without creating separate SKUs and complex workarounds.
To set up dynamic forms, you need a dedicated tool like Ultimate Product Options.
Step-by-Step Tutorial: Setting Up Dynamic Product Options
In this tutorial, we will build a classic dynamic workflow: Showing a text field, character counter, and font picker only when a shopper checks "Add Custom Engraving (+$5.00)."
Step 1: Install Ultimate Product Options
Install Ultimate Product Options from the Shopify App Store. The app works with Online Store 2.0 theme app blocks, ensuring zero theme slowdown and no coding required.
Step 2: Create a New Option Set
- In your Shopify Admin, navigate to Apps > Ultimate Product Options.
- Click Create Option Set.
- Assign the option set to your target products or collections (e.g., all products in your Personalized Gifts or Rings collection).
Step 3: Add the Trigger Option (The Checkbox)
First, create the field that will trigger your conditional rule.
- Click Add Option and select Checkbox or Switch as the option type.
- Set the label to:
Add Custom Engraving. - Under Price Add-On / Extra Charge, set the upcharge value (e.g.,
+$5.00). - Save the option.
Step 4: Add the Dependent Child Fields
Now, add the customization fields that should remain hidden until the checkbox is checked.
- Add the Text Input Field:
- Option Type: Short Text or Text Field.
- Label:
Engraving Text (Max 25 Characters). - Set validation rules: Max length
25, placeholdere.g., Forever & Always.
- Add the Font Selector:
- Option Type: Dropdown or Radio Buttons.
- Label:
Select Font Style. - Values: Classic Serif, Modern Sans, Elegant Script.
Step 5: Configure the Conditional Logic Rules
Now, link the child fields to the parent trigger using smart rules:
- Edit your Engraving Text option and locate the Conditional Logic settings.
- Enable conditional display and create your rule:
- Condition:
Show this option IF - Field:
Add Custom Engraving - Operator:
is equal to / is checked->Yes / Checked
- Condition:
- Repeat the exact same rule for the Select Font Style dropdown.
- Set both child fields as Required when visible, ensuring customers cannot check the box without typing their message.
Step 6: Preview and Test Your Dynamic Form
- Open your product page in the preview or theme customizer.
- Verify that when the page loads, the engraving input and font dropdown are completely hidden.
- Click Add Custom Engraving (+$5.00):
- The text input and font selector should instantly slide into view.
- The total product price should update dynamically on-screen.
- Uncheck the box: the fields should hide and the price should return to base.
Advanced Conditional Logic Scenarios
| Scenario | Trigger Selection | Dynamic Action (Show/Hide/Update) |
|---|---|---|
| Multi-Tier Bundles | Customer selects "3-Pack Box" | Reveal 3 individual dropdowns for custom item selection |
| Material-Based Fonts | Customer selects "Wood" finish | Show script & cursive font options; hide metallic foil fonts |
| Photo Uploads | Customer checks "Add Custom Portrait" | Reveal File Upload field (PNG/JPG/PDF) & upload preview |
| Rush Delivery | Customer selects "Rush Production (24h)" | Add a flat +$15 fee and reveal a Date Picker for deadline |
Best Practices for Dynamic Product Options
- Use Clear Field Labels: Ensure shoppers immediately understand why a new option appeared (e.g., "Step 2: Enter your custom text").
- Enforce Validation Rules: If a revealed field is necessary to fulfill the order, mark it as required with clear character limits to avoid post-purchase fulfillment delays.
- Maintain Mobile Responsiveness: Test your conditional forms on mobile devices to confirm that newly revealed inputs do not cause jarring layout shifts or hide the "Add to Cart" button.
- Pair with Clear Pricing: Always show the exact add-on amount next to the trigger option so customers aren’t surprised when the cart total updates.
Conclusion
Conditional logic turns complex, cluttered product pages into clean, intuitive buying experiences. By presenting shoppers only with the options relevant to their choices, you reduce decision fatigue, eliminate checkout friction, and boost average order value.
With Ultimate Product Options, setting up dynamic show/hide rules, custom swatches, and paid add-ons takes just a few clicks inside your Shopify Admin—no custom code required.