

Last updated: November 6, 2026. Disclosure: Webiots develops Ultimate Product Options, the app used in the setup steps. Plan details come from its public Shopify App Store listing.
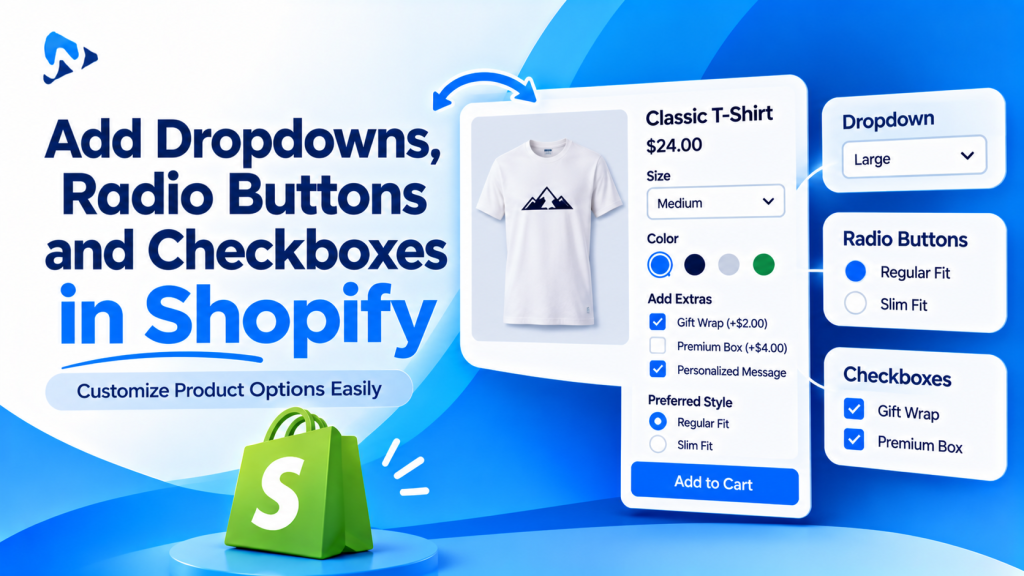
Quick answer: Shopify shows variants as dropdowns or buttons, depending on your theme’s variant picker setting. To add dropdowns, radio buttons or checkboxes that aren’t variants, such as “Add gift wrap” or “Choose a font”, use a product options app or add fields to your theme’s product form with code. Use dropdowns for long lists, radio buttons for 2 to 5 visible choices, and checkboxes for yes-or-no extras.
Key takeaways:
- Variants control the dropdown or button style.
- Extra fields need an app or theme code.
- Pick the field type by number of choices.
In this guide
- Dropdown, radio or checkbox?
- Change how variants display
- Add fields with theme code
- Add fields with an app
- Common mistakes
- The bottom line
- FAQ
When Should You Use a Dropdown, Radio Buttons or a Checkbox?
Choose by how many options there are and whether the shopper picks one, several or none.
| Field type | Best for | Example | Avoid when |
|---|---|---|---|
| Dropdown | One choice from a long list | Ring size, country, birth month | There are only 2 or 3 choices; shoppers can’t see them without tapping |
| Radio buttons | One choice from 2 to 5 options, all visible | Small / Medium / Large, matte or gloss finish | There are many choices; the page gets long on mobile |
| Checkbox | A yes-or-no extra, or several extras | Add gift wrap (+$5), add engraving | The shopper must pick exactly one option |
| Swatches | Choices people judge by sight | Colors, fabrics, fonts | The choices look the same, like sizes |
How Do You Change How Shopify Variants Display?
In most themes, the variant picker setting switches all variants between dropdowns and buttons. Variants are your product’s built-in options, such as Size and Color, with up to 3 options and 2,048 variants per product (Shopify Help Center).
- Go to Online Store > Themes > Customize.
- Switch to your product template and click the Product information section.
- Click the Variant picker block. The name can vary by theme.
- Choose Dropdown or Pills (buttons), and swatches if your theme offers them.
- Click Save.
Most themes apply one style to every variant option, so you can’t easily show Color as buttons and Size as a dropdown without code. And variants can’t add choices that aren’t real product versions, such as gift wrap. For those, add separate fields.
How Do You Add a Checkbox or Dropdown With Theme Code?
Add an input inside the product form with a name that starts with “properties”, and Shopify saves the choice on the order as a line item property (Shopify Dev Docs). For example, a gift wrap checkbox:
<label>
  <input type="checkbox" name="properties[Gift wrap]" value="Yes">
  Add gift wrap
</label>
And a dropdown:
<label for="frame-color">Frame color</label>
<select id="frame-color" name="properties[Frame color]">
  <option value="Black">Black</option>
  <option value="Oak">Oak</option>
  <option value="White">White</option>
</select>- Place it inside the product form, or the choice won’t reach the cart. See how to fix options not showing in the cart.
- It can’t add a price. A checkbox labelled “+$5” won’t charge $5 without more code or an app.
- Edit a duplicate theme first, and test with a real order. For a full walkthrough, see how to add a custom text field.
How Do You Add Dropdowns, Radio Buttons and Checkboxes With an App?
Create an option set, add each field type, then add prices and rules. Webiots develops Ultimate Product Options; plan details are from its App Store listing.
- Install Ultimate Product Options and turn on its app embed in the theme editor.
- Create an option set and assign it to a product or collection.
- Add a dropdown, such as “Frame color” with Black, Oak and White.
- Add radio buttons, such as “Print finish” with Matte and Gloss.
- Add a checkbox, such as “Add gift wrap”, with an add-on price of +$5. Add-on pricing is on the free plan.
- Add conditional logic (Basic plan and above) to show a “Gift message” field only when gift wrap is ticked. See how to set up conditional logic.
- Make key fields required and place a test order. See how to make product options required.
Add dropdowns, radio buttons and checkboxes without code
Add-on prices on the free plan, with conditional logic and required fields from $7.99. 14-day free trial on paid plans.
What Are the Most Common Mistakes?
- A dropdown for 2 choices: use radio buttons so shoppers see both without tapping.
- Radio buttons with 10 choices: use a dropdown or swatches to keep the page short on mobile.
- A checkbox for a must-pick choice: shoppers can skip a checkbox, so use radio buttons and make it required.
- No price next to paid extras: show “+$5” in the label so the total isn’t a surprise. See how to charge extra for options.
- Turning extras into variants: gift wrap as a variant doubles your variants and stock records for no reason.
The Bottom Line
Use your theme’s variant picker for real product versions, and add dropdowns, radio buttons and checkboxes for everything else. Pick the field type by how many choices there are: radio buttons for a few, a dropdown for many, and a checkbox for optional extras. Theme code works for simple fields; an app adds prices, rules and required fields without code. Either way, test with a real order.
Want to add these fields without code? Install Ultimate Product Options free or learn more about the app.
Frequently Asked Questions
How do I change Shopify variants from a dropdown to buttons?
In most themes, open the theme editor, click the Variant picker block in the product information section, and choose Pills or Dropdown. The setting name varies by theme.
Can I add a checkbox to a Shopify product page without an app?
Yes. Add a checkbox inside the product form with a name like properties[Gift wrap]. It saves the choice on the order, but it can’t add a price without more code.
How do I add radio buttons to a Shopify product page?
Use a product options app to add radio buttons as an option type, or add radio inputs with the same properties name to your theme’s product form.
Can I charge extra for a checkbox on Shopify?
Yes, with a product options app that supports add-on pricing, such as +$5 for gift wrap. Ultimate Product Options includes add-on pricing on its free plan.
Should I use a dropdown or radio buttons?
Use radio buttons for 2 to 5 choices so shoppers see them all, and a dropdown for longer lists.
Related Reading
- How to Add a Custom Text Field to a Shopify Product Page
- How to Add a Gift Wrap Option on Shopify
- Shopify Color and Image Swatches: Complete Guide
- How to Add More Than 3 Options to a Shopify Product
Update Log
November 6, 2026: First published.